Dirt Cups
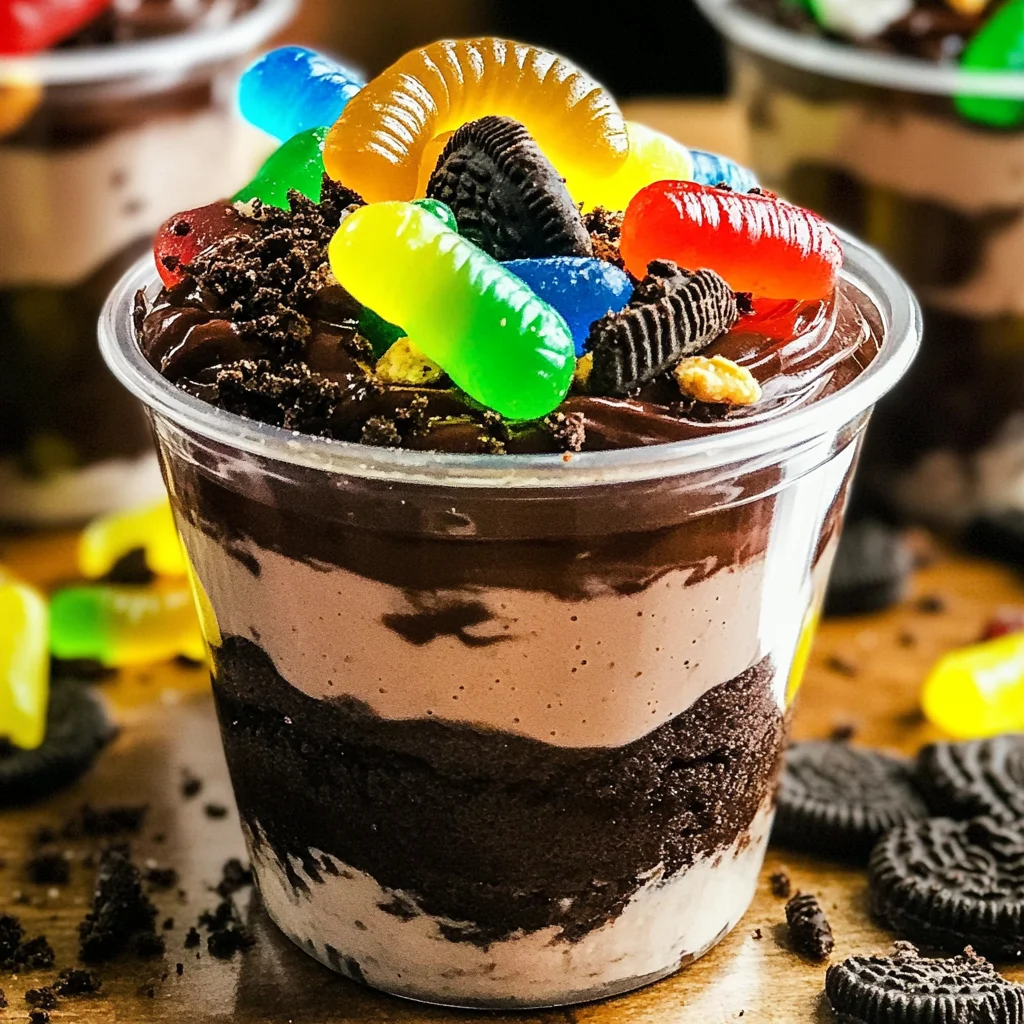
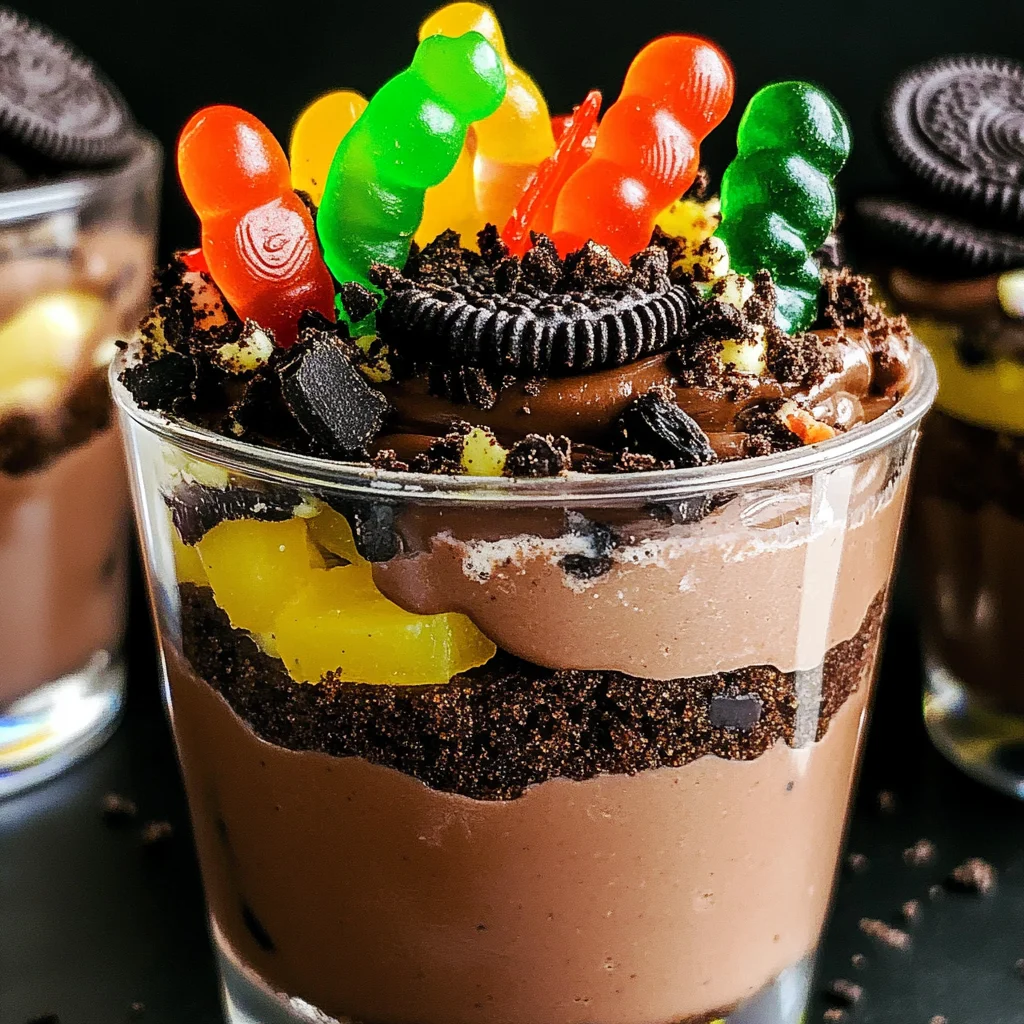
Layers of rich chocolate pudding, crunchy crushed Oreos, and vibrant pectin-based gummy candies make Dirt Cups a favorite dessert for all ages! This fun and creative treat is perfect for birthdays, Halloween, or any gathering where you want to impress your guests with a unique dessert. The combination of textures and flavors creates a delightful experience that stands out.
Why You’ll Love This Recipe
- Easy to Make: With just a few simple ingredients and minimal preparation, you can whip up these delicious Dirt Cups in no time.
- Kid-Friendly Fun: Kids love the hands-on experience of creating their own cups, making this a great activity for family gatherings or parties.
- Versatile Presentation: Serve in individual cups or glasses for a charming display that suits any occasion.
- Customizable Ingredients: Feel free to swap out gummy candies or add different toppings to personalize your Dirt Cups.
- Deliciously Decadent: The creamy chocolate pudding paired with crunchy Oreos offers an irresistible flavor combination.
Tools and Preparation
To create your Dirt Cups, you’ll need some essential tools to ensure a smooth process. These tools will help you achieve the perfect texture and presentation.
Essential Tools and Equipment
- Mixing bowl
- Whisk
- Measuring cups
- Serving glasses or cups
- Spoon
Importance of Each Tool
- Mixing bowl: A sturdy mixing bowl is essential for combining ingredients without spills. It holds enough volume for blending the pudding mix and milk effectively.
- Whisk: A whisk helps incorporate air into the pudding mixture, ensuring a smooth and fluffy texture. It’s crucial for achieving the right consistency.
- Serving glasses or cups: Using clear cups allows the layers of dirt cups to shine, creating an appealing presentation that enhances the dessert experience.
Ingredients
Layers of chocolate pudding, crushed Oreos topped with pectin-based gummy candies!
For the Pudding Mixture
- 3.4 ounces box instant chocolate pudding mix
- 2 cups milk
- 8 ounces whipped topping (thawed)
For the Topping
- 10-12 Oreo cookies (crushed)
- 32 pectin-based gummy candies
How to Make Dirt Cups
Step 1: Prepare the Pudding Mixture
In a medium bowl, add cold milk and sprinkle pudding over top. Whisk until well combined. Let sit for 5 minutes to thicken.
Step 2: Fold in Whipped Topping
Gently fold in whipped topping until everything is well blended. This adds creaminess to your Dirt Cups.
Step 3: Assemble Your Dirt Cups
Spoon the pudding mixture into glasses or cups.
Step 4: Add Crunchy Oreo Topping
Sprinkle crushed Oreo cookies generously on top of each cup of pudding.
Step 5: Top with Gummy Candies
Add 4 pectin-based gummy candies on top of each cup to give them that classic dirt look!
Step 6: Chill Before Serving
Chill your Dirt Cups until you’re ready to serve them. This enhances the flavors and makes them refreshing!
How to Serve Dirt Cups
Dirt Cups are a fun and playful dessert that can be enjoyed in various ways. Here are some creative serving suggestions to make your Dirt Cups even more delightful!
For Kids’ Parties
- Colorful Straws: Add vibrant, themed straws for a festive touch that kids will love.
- Themed Toppers: Use cupcake toppers or edible decorations related to the party theme, like bugs or flowers.
As a Movie Night Treat
- Individual Cups: Serve in small cups for easy snacking while watching your favorite movie.
- Mini Spoons: Offer tiny spoons for a cute and manageable way to enjoy each layer.
For Holiday Gatherings
- Layered Presentation: Use clear glasses to showcase the beautiful layers of chocolate pudding, Oreo crumbs, and gummy candies.
- Seasonal Garnishes: Top with seasonal sweets like candy corn for Halloween or red and green sprinkles for Christmas.
As a Fun Dessert Bar
- DIY Station: Set up a dessert bar where guests can build their own Dirt Cups with additional toppings like crushed nuts or fruit.
- Labeling Toppings: Clearly label all toppings so guests know what they can add to their creations.
How to Perfect Dirt Cups
Creating the perfect Dirt Cups is easy with these simple tips. Follow these guidelines for an exceptional dessert experience.
- Bold Layering Technique: Layer the pudding and crushed Oreos carefully to maintain distinct layers for visual appeal.
- Bold Whipped Topping Folding: Gently fold in the whipped topping to keep it light and fluffy, enhancing the texture.
- Bold Chill Time: Allow the cups to chill for at least 30 minutes before serving. This helps the flavors meld together beautifully.
- Bold Candy Options: Experiment with different pectin-based gummy candies for varied flavors and textures; try worms, frogs, or fruit shapes!
- Bold Presentation Ideas: Use unique glassware or jars that match your event’s theme for an eye-catching presentation.
Best Side Dishes for Dirt Cups
Dirt Cups are best enjoyed with complementary side dishes that enhance your dessert experience. Here are some great options:
- Bold Fruit Salad: A refreshing mix of seasonal fruits adds a light contrast to the richness of Dirt Cups.
- Bold Veggie Platter: Crisp vegetables served with a flavorful dip provide a crunchy bite that balances sweetness.
- Bold Cheese Platter: A selection of mild cheeses pairs well with the creamy texture of Dirt Cups.
- Bold Mini Sandwiches: Simple finger sandwiches filled with cream cheese or veggies make for a savory side option.
- Bold Chocolate-Covered Pretzels: These sweet-and-salty treats offer an exciting crunch alongside your dessert.
- Bold Trail Mix: A blend of nuts, seeds, and dried fruits gives guests a healthy nibble option at your gathering.
Common Mistakes to Avoid
Avoiding common pitfalls can make your Dirt Cups even better. Here are some mistakes to watch out for:
- Ignoring the pudding thickness – Make sure to let the pudding sit long enough to thicken before adding other ingredients. This ensures a great texture.
- Overmixing the whipped topping – Gently fold in the whipped topping to keep it light and airy. Overmixing can lead to a dense mixture.
- Not crushing Oreos finely enough – For optimal texture, crush the Oreo cookies into small pieces. This enhances the layering effect in your Dirt Cups.
- Skipping the chilling time – Allow your Dirt Cups to chill before serving. This helps all the flavors meld together and improves overall taste.
- Using non-compatible gummy candies – Ensure your gummy candies are pectin-based for proper gelling without gelatin. This keeps your dessert suitable for everyone.
Storage & Reheating Instructions
Refrigerator Storage
- Store any leftovers in airtight containers.
- Enjoy them within 3-5 days for best quality.
Freezing Dirt Cups
- Freeze in individual servings for up to 2 months.
- Use freezer-safe containers to prevent freezer burn.
Reheating Dirt Cups
- Oven – Not recommended as it may alter texture.
- Microwave – Heat on low power in short intervals, checking frequently.
- Stovetop – Place in a saucepan over low heat, stirring gently until warmed through.
Frequently Asked Questions
What are Dirt Cups?
Dirt Cups are a fun and delicious dessert made with layers of chocolate pudding, crushed Oreos, and topped with gummy candies.
Can I customize my Dirt Cups?
Absolutely! You can add different toppings like sprinkles or use various flavors of pudding to suit your taste.
How long do Dirt Cups last?
When stored properly in the refrigerator, Dirt Cups will last about 3-5 days.
Are there alternatives for Oreos?
Yes, you can use any chocolate sandwich cookie that meets your preferences or dietary needs.
Can I make Dirt Cups ahead of time?
Yes! In fact, making them ahead allows the flavors to blend beautifully. Just remember to chill before serving.
Final Thoughts
Dirt Cups are not only delightful but also versatile. You can easily customize them with different toppings or flavors. This fun dessert is perfect for parties, gatherings, or simply as a sweet treat at home. Try making it your own!

Dirt Cups
- Total Time: 0 hours
- Yield: Serves 4
Description
Indulge in the delightful layers of Dirt Cups, a fun and creative dessert loved by all ages! This whimsical treat features rich chocolate pudding, crunchy crushed Oreos, and vibrant pectin-based gummy candies, making it perfect for birthdays, Halloween, or any festive gathering. The combination of creamy textures and playful flavors creates an unforgettable dessert experience that’s easy to assemble and even more enjoyable to eat. Kids will love getting involved in the preparation, adding their favorite toppings to personalize each cup. Serve them in clear glasses to showcase the beautiful layers, and watch as they disappear at your next party!
Ingredients
- 3.4 ounces instant chocolate pudding mix
- 2 cups milk
- 8 ounces whipped topping (thawed)
- 10–12 Oreo cookies (crushed)
- 32 pectin-based gummy candies
Instructions
- In a medium bowl, combine cold milk with the pudding mix. Whisk until well blended and let sit for 5 minutes to thicken.
- Gently fold in the whipped topping until fully combined for a creamy texture.
- Spoon the pudding mixture into serving cups or glasses.
- Generously sprinkle crushed Oreo cookies on top of each cup.
- Add four pectin-based gummy candies on top for that classic 'dirt' look.
- Chill the cups until ready to serve for enhanced flavor.
- Prep Time: 15 minutes
- Cook Time: None
- Category: Dessert
- Method: No-Bake
- Cuisine: American
Nutrition
- Serving Size: 1 serving
- Calories: 290
- Sugar: 25g
- Sodium: 200mg
- Fat: 14g
- Saturated Fat: 7g
- Unsaturated Fat: 6g
- Trans Fat: 0g
- Carbohydrates: 38g
- Fiber: 2g
- Protein: 4g
- Cholesterol: 15mg

